Wacom Authorised Distributor & Fingerprint Scanners Supplier.
- (+91) 8888881601
- support@sipune.com
- Wacom Experience Centre. Shop No. 24, Ground Floor, B Wing, Mittal Court, Mudaliar Road, Rasta Peth,, Pune, Maharashtra, India. 411011
© 2020 Sharada Business Solutions Private Limited. All Rights Reserved

By Tanya Gadsby
Teachers can use visual notes in almost any classroom setting: when you’re explaining a topic, or when students are sharing ideas, insights, or presenting. Visual notes help enhance learning and information retention. They’re effective for any student – whether elementary, high school, or post-secondary.
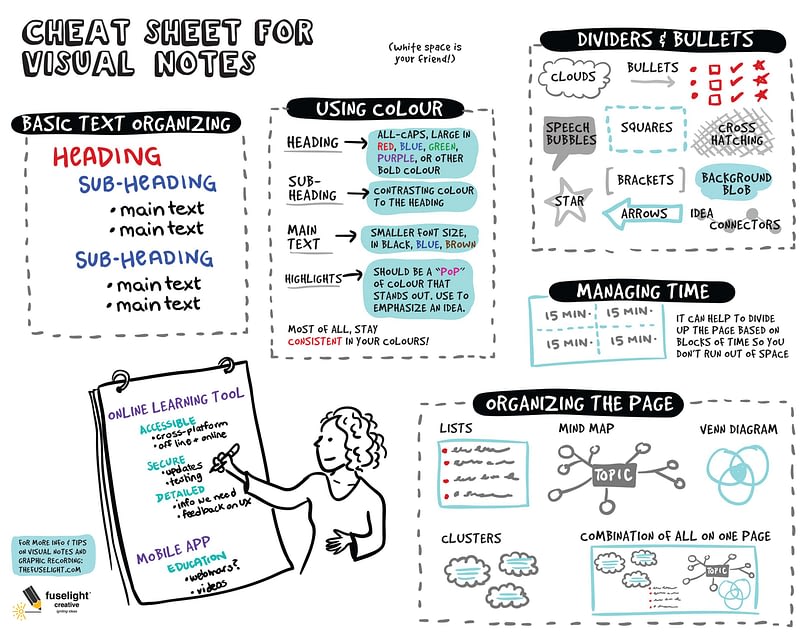
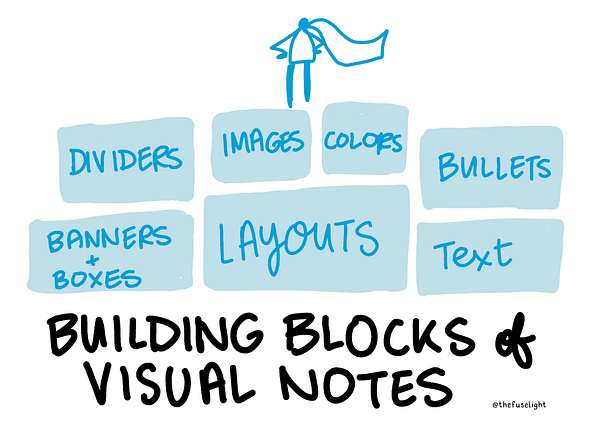
There are a few basic building blocks of visual notes. Layouts are core to visual notes, as the clarity of your visual notes is all about how you organize content on the page. Other components include text, banners & boxes, dividers, bullets, images, and colors. You’ll be a visual note taking super hero if you have a basic understanding of these.
LAYOUTS
Your layout is how you organize the content and the “path” you want the viewer to follow. There are many ways of laying out your visual notes, but these are five basic ones.
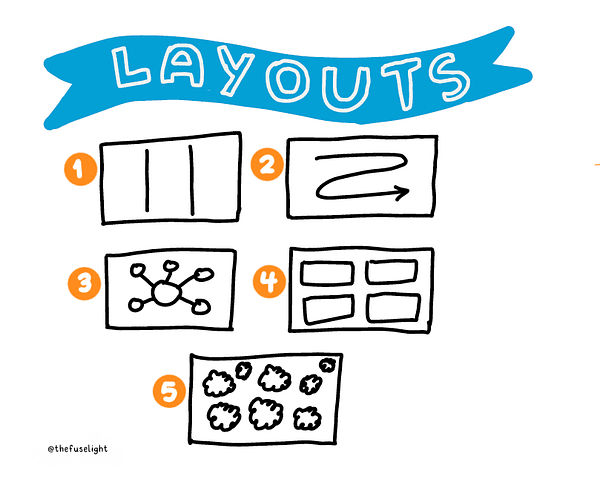
Columns
Split the page into three, and start drawing left to right, filling up each column as you go.
Pathway
Snake your content around the page, and you might use a big arrow to guide the reader.
Hub and spoke layout (or mind map layout)
Your main topic is the hub in the middle, and sub topics radiate out. For example, you might have a diagram of an animal cell as the hub and each component of the cell as a spoke.
Boxes
Like a comic book, you might like to work with boxes as your main layout. Each box could be a different topic.
Popcorn layout
A popcorn layout is more open to putting content anywhere on the page.
TEXT
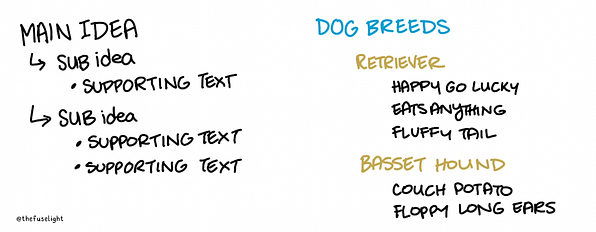
It’s best to keep your text organized by Main Idea, Sub-Idea, and Supporting Text. Your main idea is the big topic you’re covering, and it might have multiple sub-ideas. Same for the supporting text.
BANNERS & BOXES
Banners and boxes are containers for your content. They really help split up a lot of text, and help the eye navigate the page. They also don’t have to be banners and boxes – they could be an image like a car!

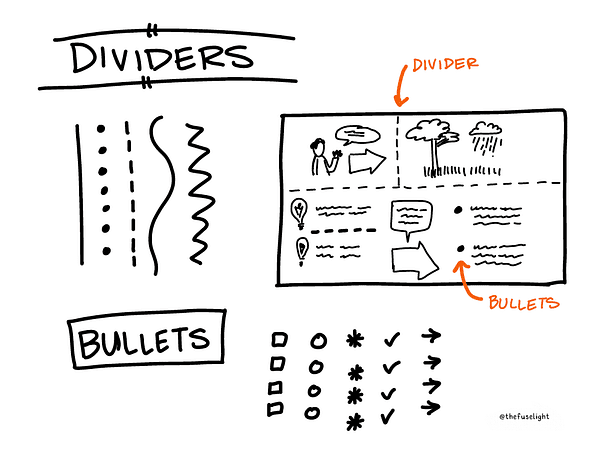
DIVIDERS & BULLETS
Dividers are great for splitting up content you’ve captured to help differentiate it. Dividers can be any style of line or shape you can think of.
Bullets are another type of divider because they help anchor each piece of text you’ve written in a list. These are a few simple ones, but bullets can be whatever you think up!
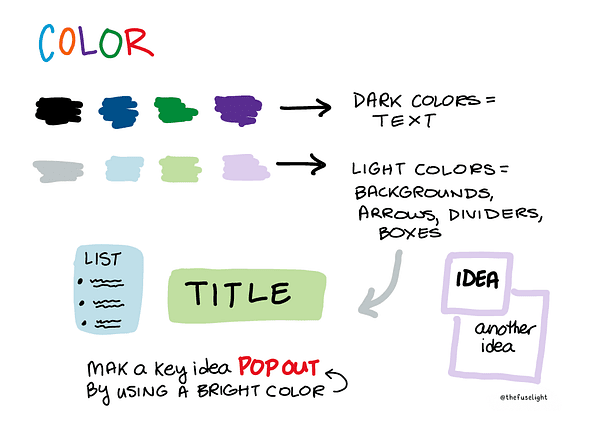
COLOR
We could go down a rabbit hole on color theory, but a good principle to keep in mind is dark colors are best for text, and light colors are best for background content that you don’t want to compete with your text. Background content can also include arrows, shapes, and dividers.
You can also use a bright color, such as red or orange, to make a key idea pop in your text.
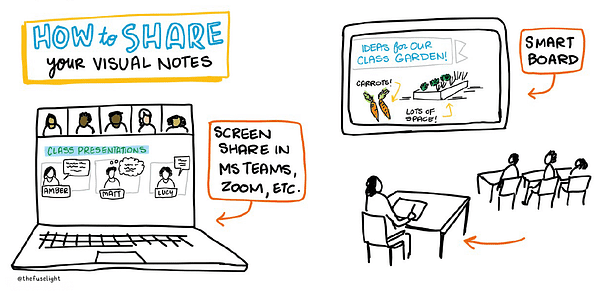
SHARING YOUR VISUAL NOTES
For online classes, you can share your visual notes through screen share in Microsoft Teams, Zoom, etc.
And in the classroom, you can share visual notes to a Smart Board or projector. This is great if you don’t want to be on your feet all day at the front of the class. Some people also find working on the smaller screen is easier and quicker than writing on a large smart board.
Using visual notes in the classroom, sketchnoting in class, sharing visual notes in class
We’ve been taking visual notes in conferences around the world since 2010 (visual note-taking is also called live drawing, graphic recording, visual scribing, sketch-noting). We’re always exploring new methods and ways of using visuals to explain complex topics — from animations to clickable graphics to augmented reality!